
A permission is a named set of resource endpoints. This page walks through creating one in the admin console. For the conceptual picture, see Entities.
Before you start
Have ready:
- The tenant the permission belongs to.
- The resources whose endpoints you want to bundle — they must already be registered (How to register a resource), with the specific endpoints already added to them.
1. Open the Permissions screen
Select the tenant, then open Permissions. Each card shows the permission’s description and ID; clicking it expands the card to show the resources and endpoints it covers.
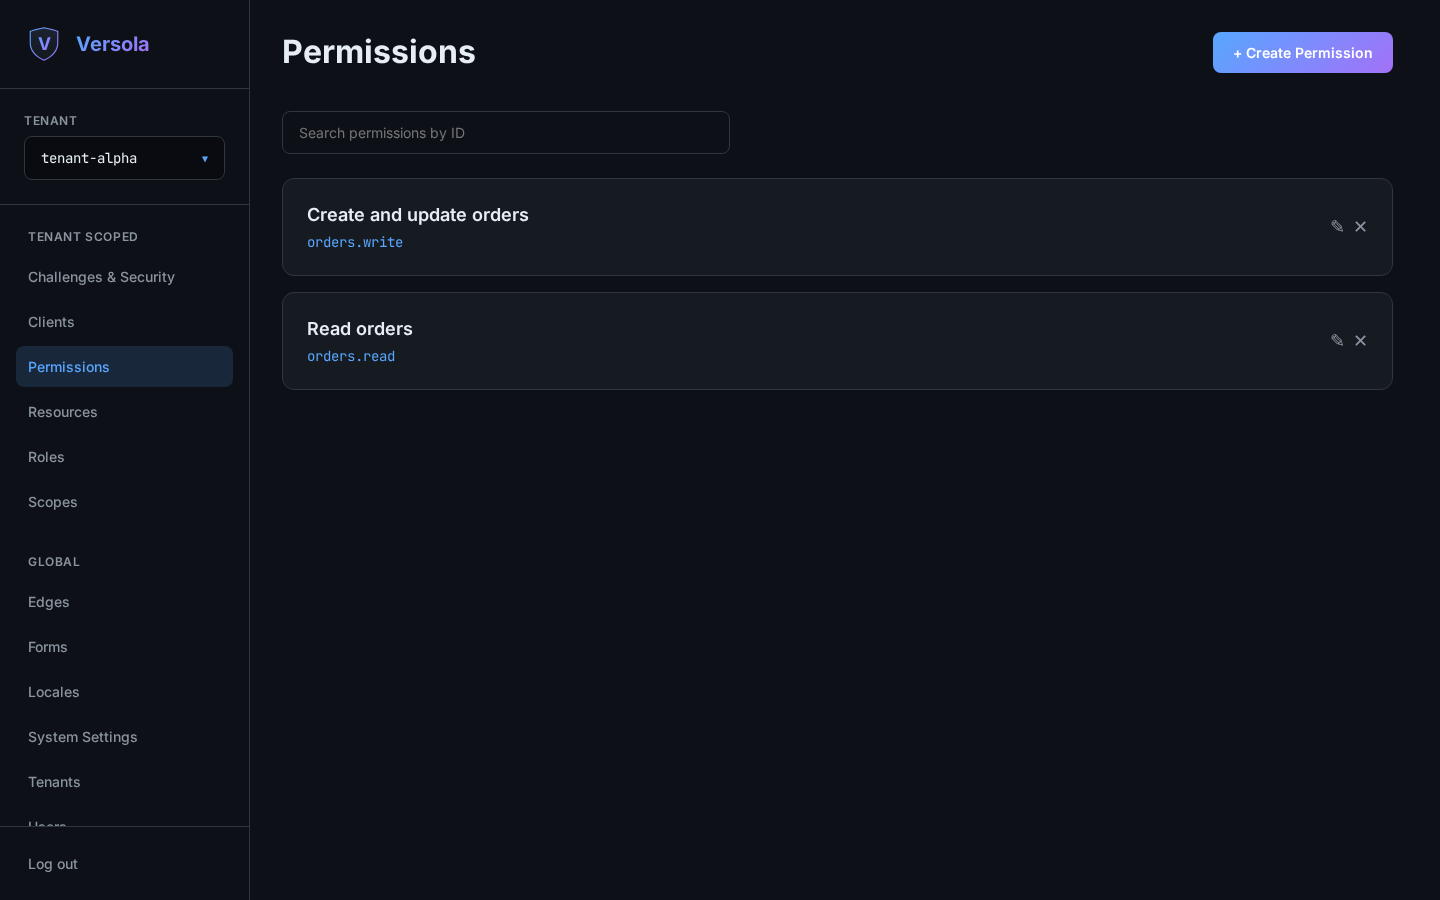
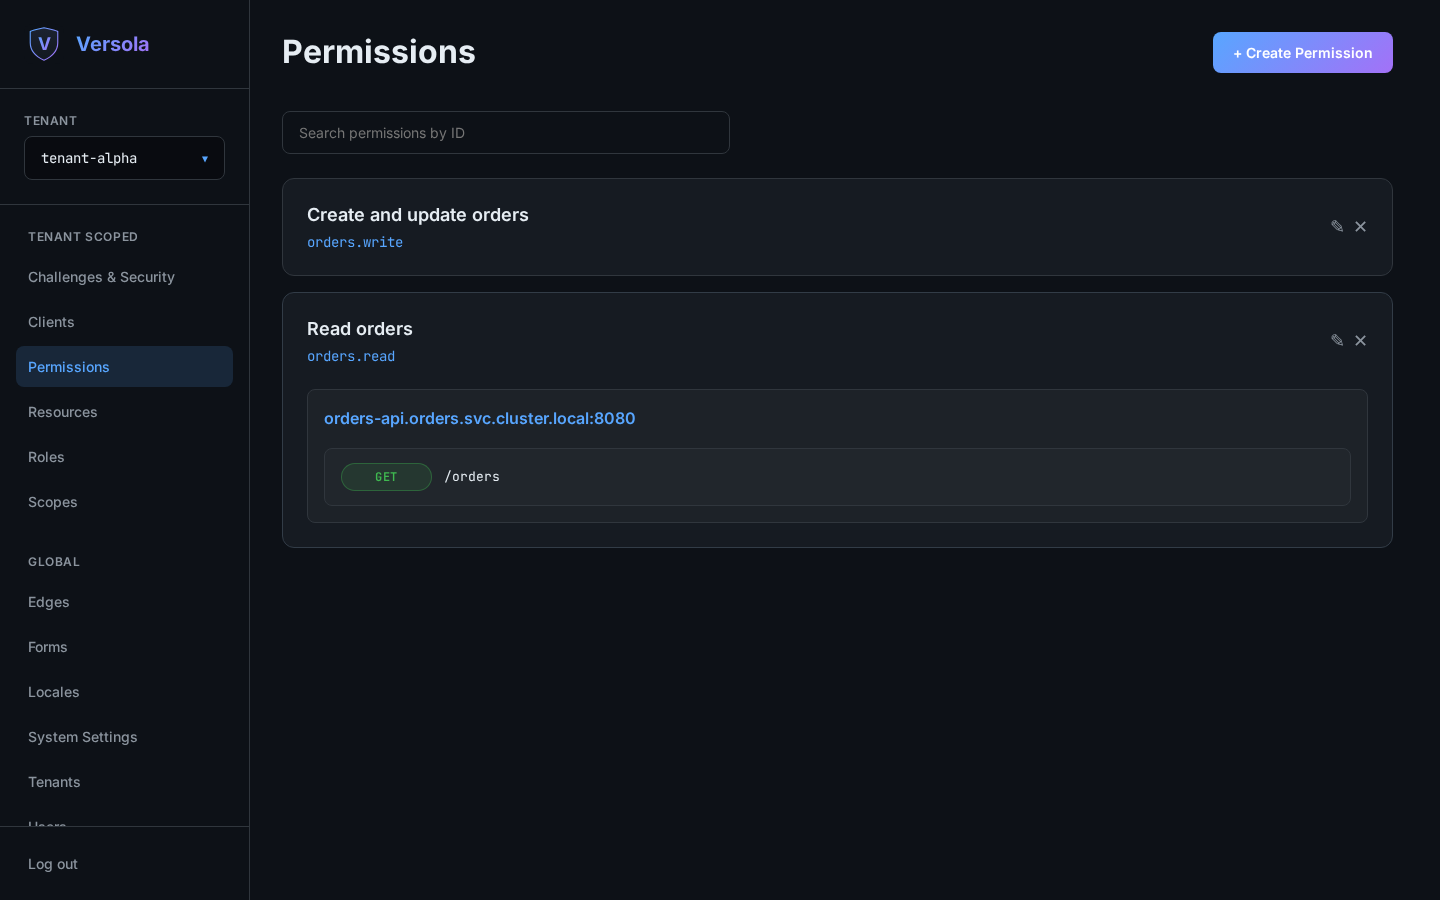
2. Start a new permission
Press + Create Permission.
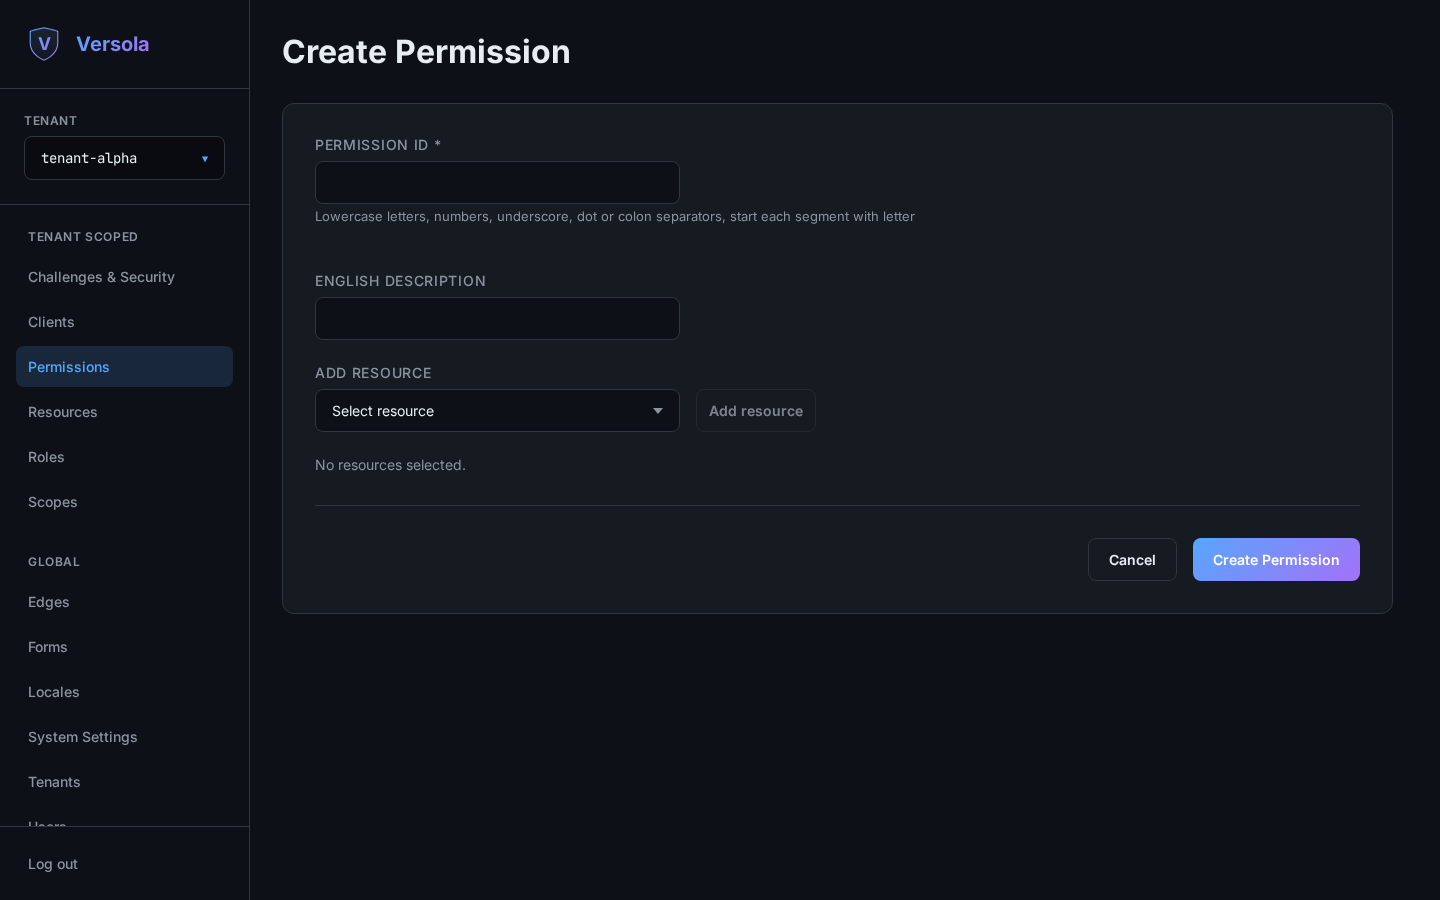
3. Fill in identity and attach endpoints
- Permission ID — lowercase segments separated by dots or colons, each starting with a
letter (e.g.
orders.read,orders:write). Immutable after creation. - English description — shown throughout the console.
- Add resource — pick a resource from the dropdown and press Add resource to expand it. Repeat for every resource this permission should span; a permission is free to combine endpoints from several resources.
- Add endpoint — inside an expanded resource, pick one of its registered endpoints and press Add endpoint. Only endpoints already defined on the resource are selectable — register them there first if the one you need is missing.
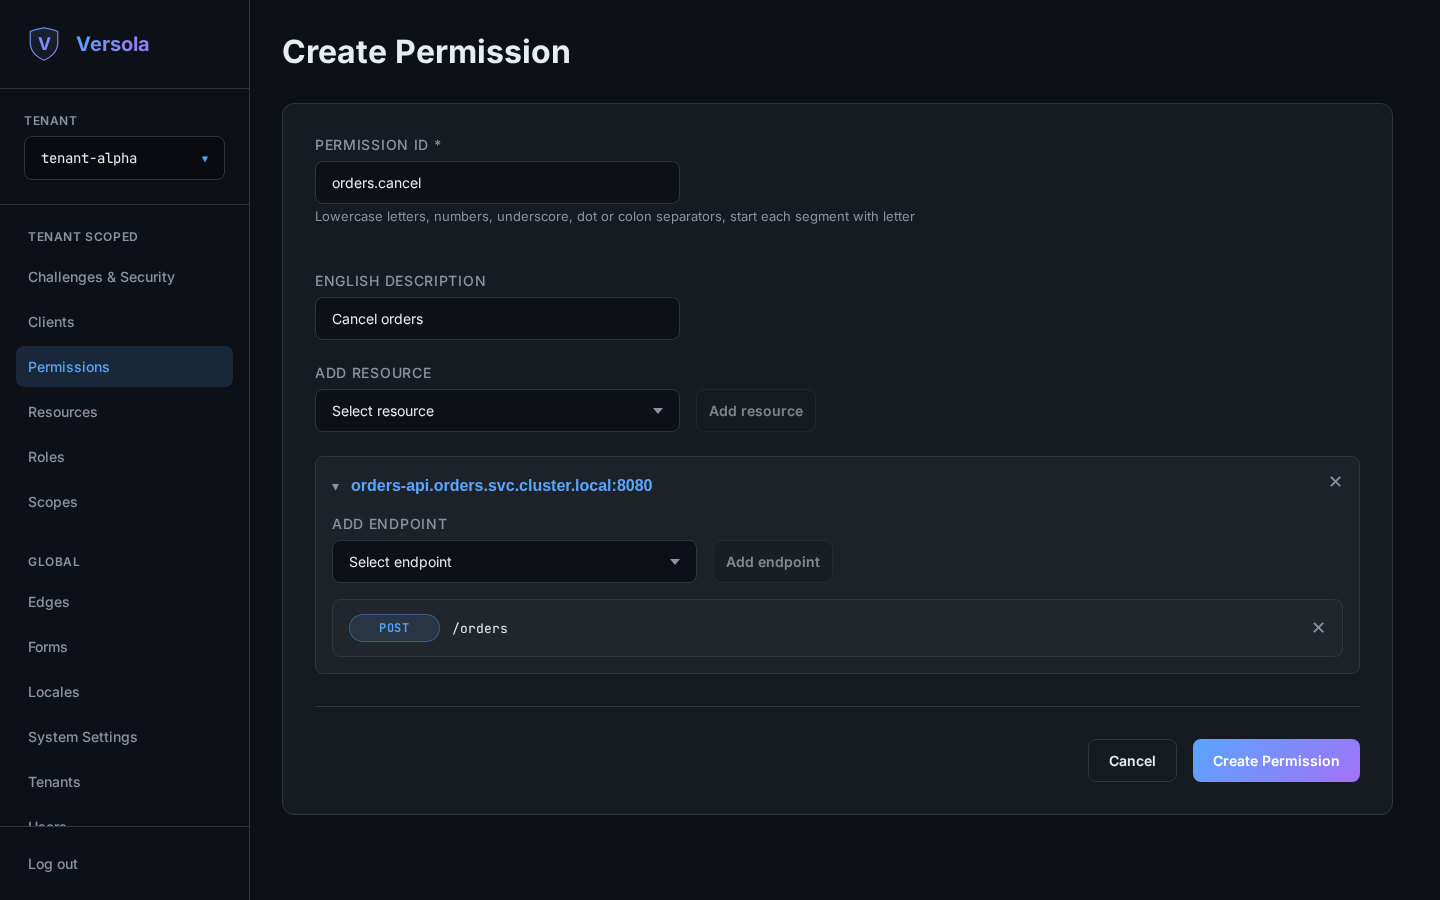
4. Create the permission
Press Create Permission. It’s now ready to attach to a role, or —
for a client_credentials integration — directly to a client’s Permissions.
Attaching a permission is only half the wiring: edge still evaluates that endpoint’s own
allow expression, step-up condition and max auth age on every call.
Editing or deleting a permission
Press the pencil icon on a permission’s card to add or remove resources and endpoints — the permission ID itself cannot be changed after creation. If an endpoint attached to a permission is later removed from its resource, the permission keeps a Detached endpoints entry so you can see and clean up the stale reference. The trash icon deletes the permission entirely; any role or client that held it loses the access it granted.