
A client is an application that asks Versola for tokens. This page walks through registering one in the admin console. For what a client is and how it relates to the other entities, see Entities.
Before you start
Have these ready:
- The tenant the application belongs to.
- The exact redirect URIs the application will use.
- The scopes it needs (create them under Scopes first if they do not exist).
- The permissions it needs in its own name — only relevant for machine-to-machine
clients using the
client_credentialsgrant.
1. Open the Clients screen
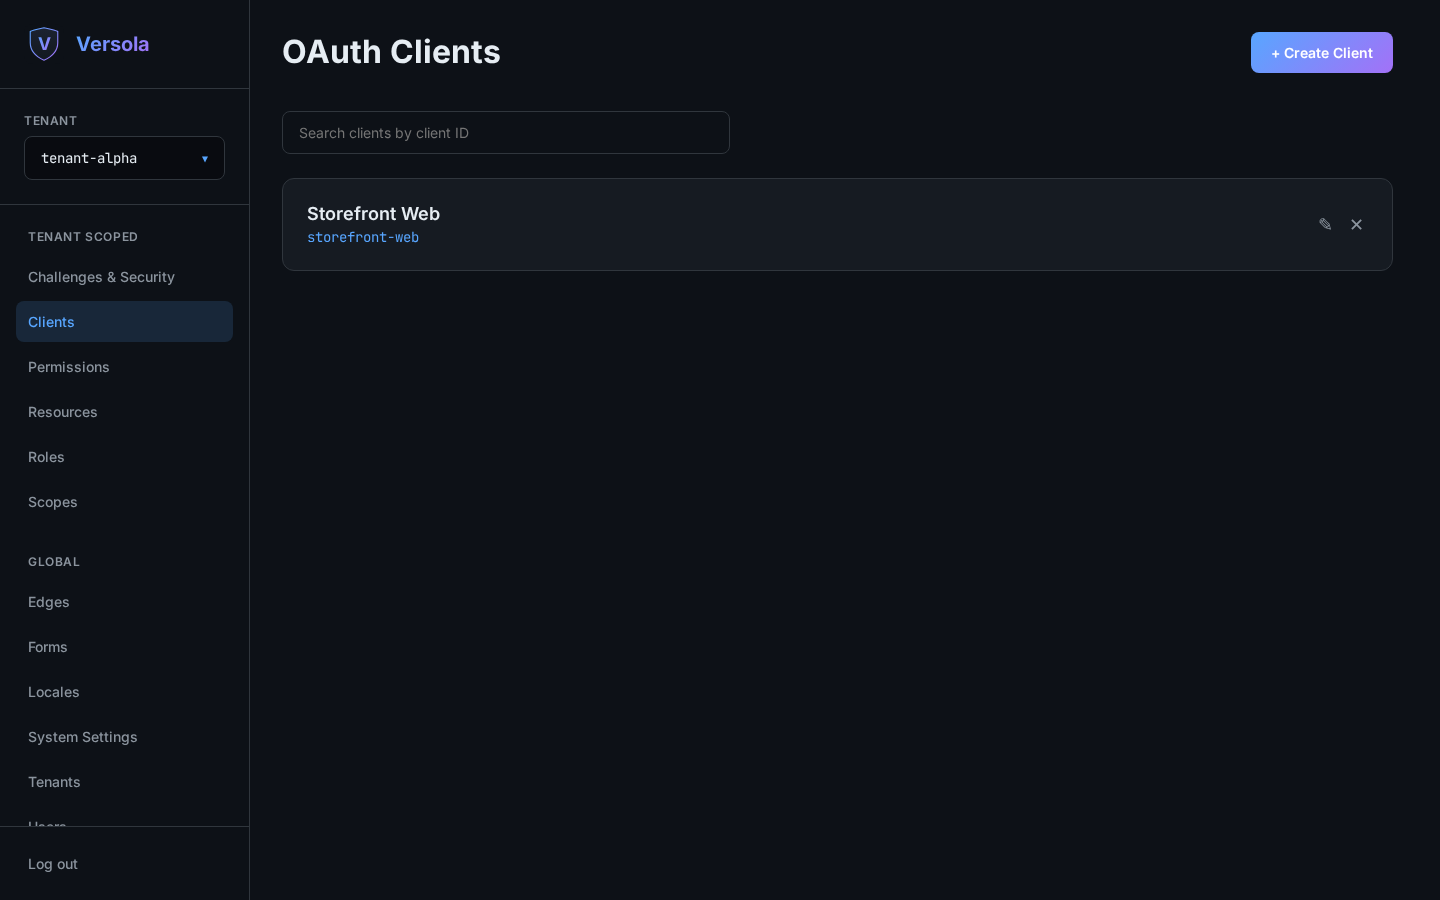
Select the tenant in the sidebar, then open Clients. The list shows every client registered in that tenant, with its client ID and a Secret Rotation badge when a previous secret is still active.
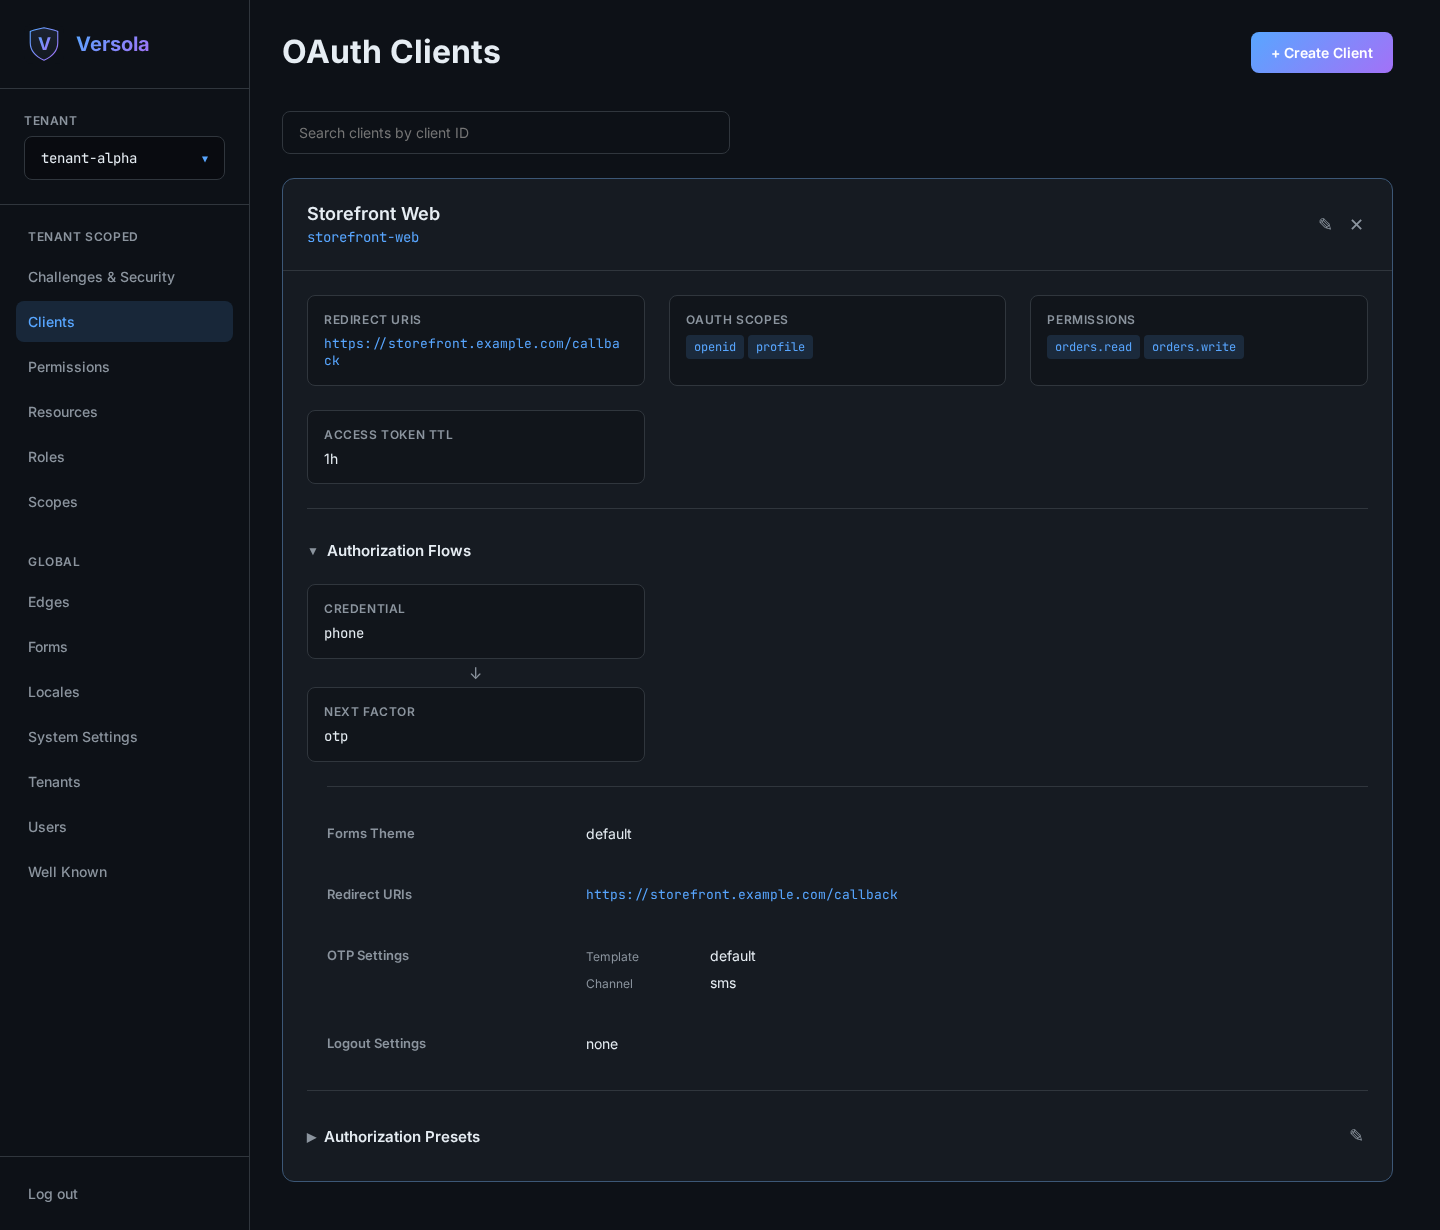
Clicking a card expands it to show the full configuration — redirect URIs, scopes, permissions, token TTL and the auth flow.
2. Start a new client
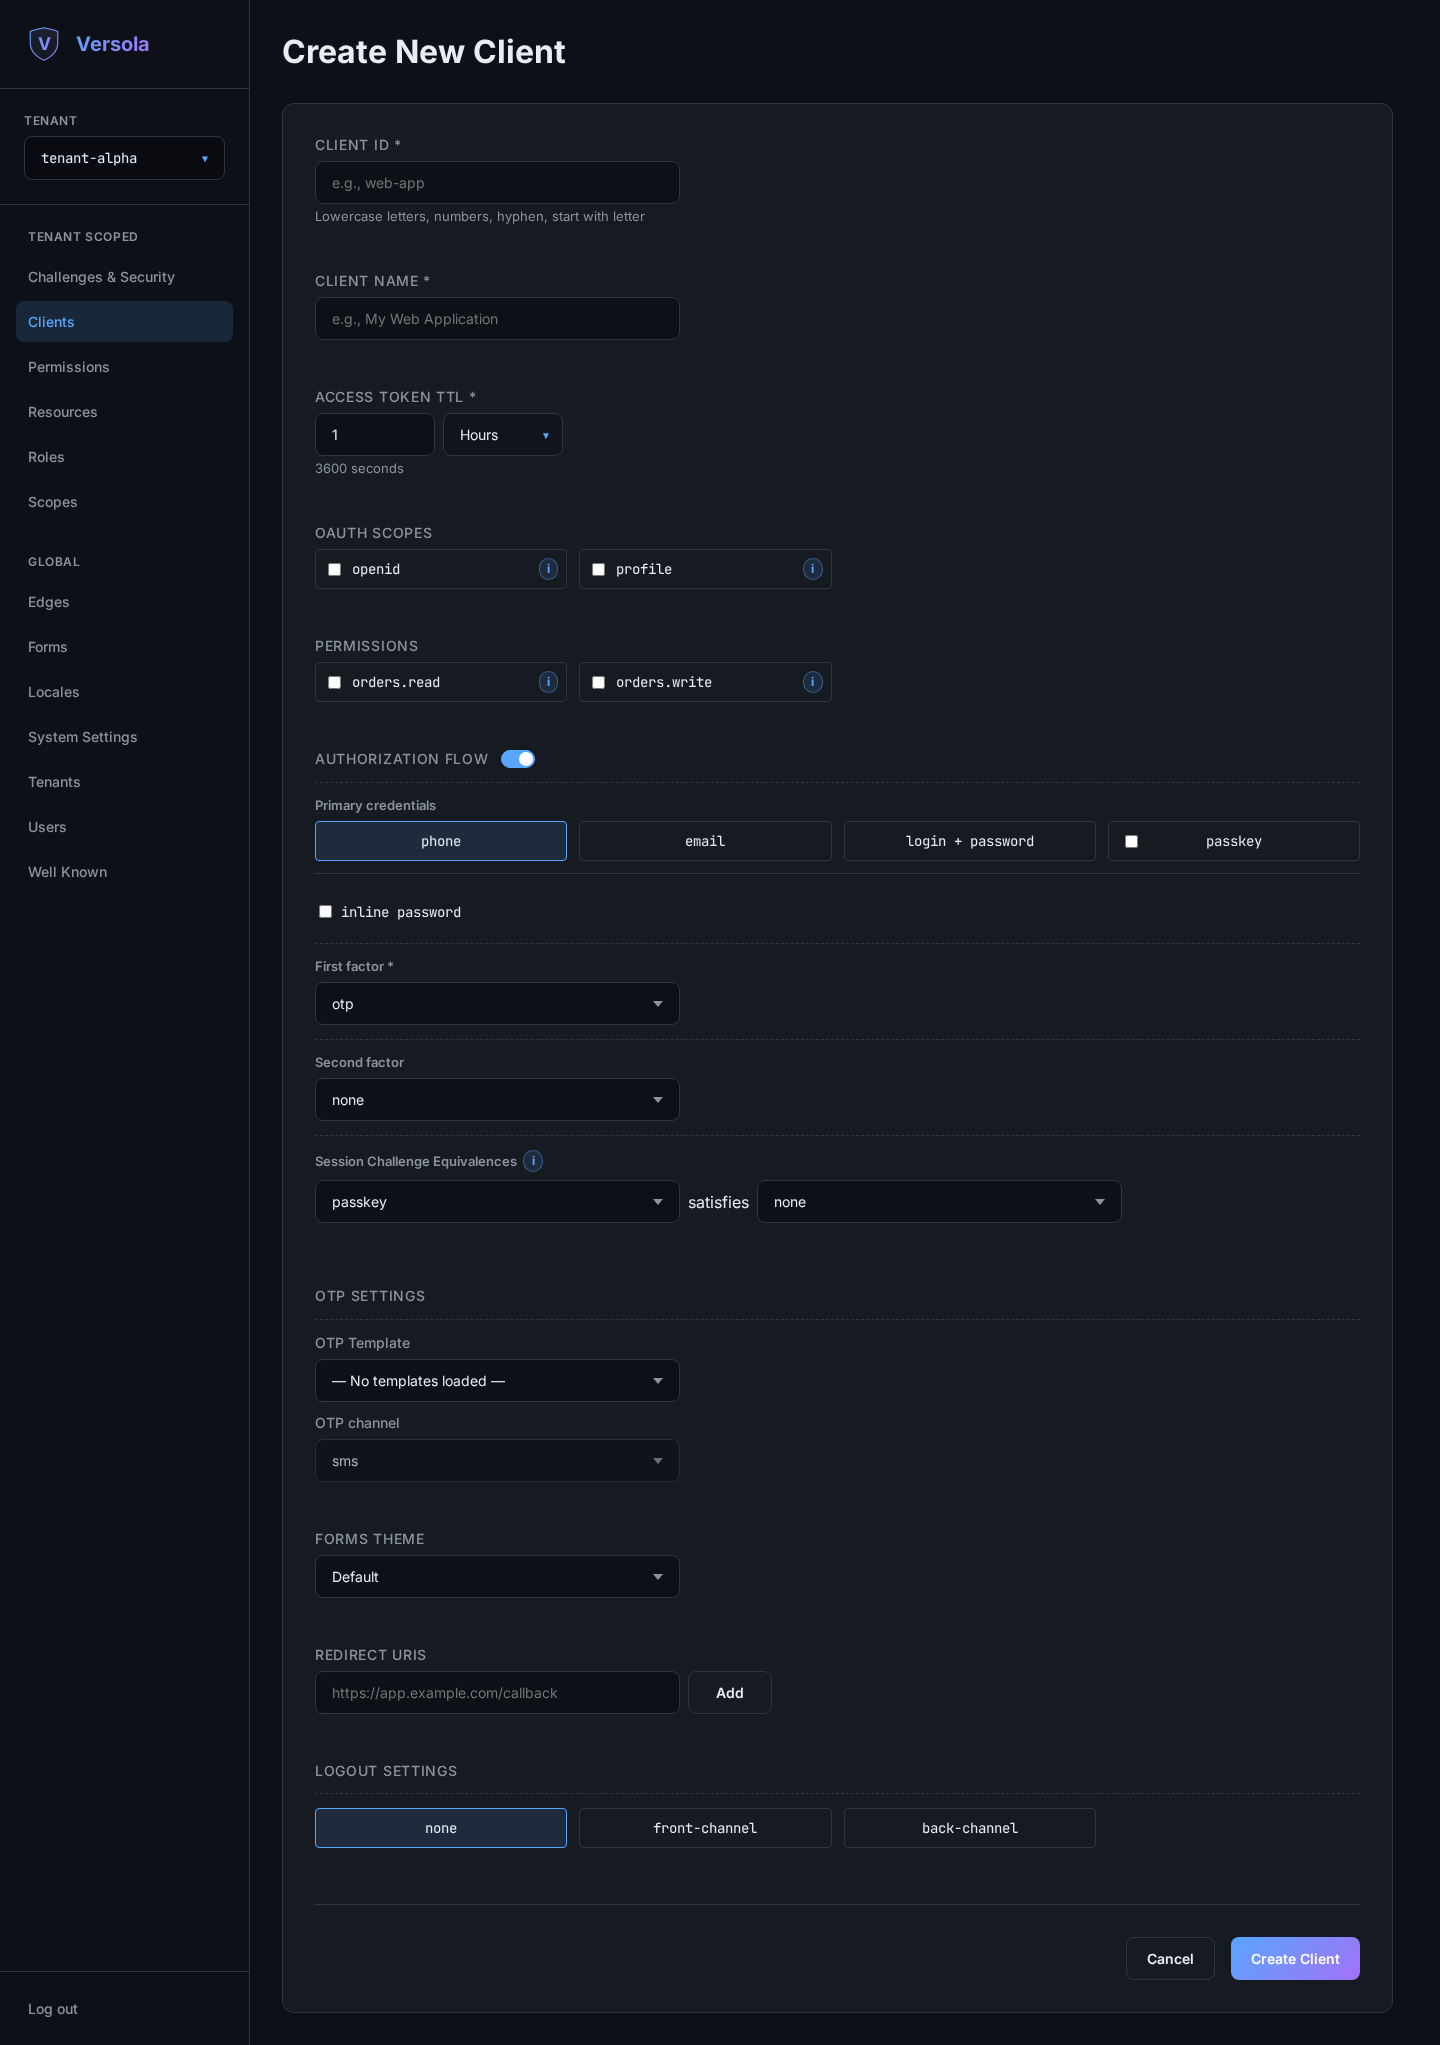
Press + Create Client.
3. Fill in identity and token settings
- Client ID — lowercase letters, digits and hyphens, starting with a letter. Immutable after creation.
- Client Name — human-readable label shown in the console and on login screens.
- Access Token TTL — entered in minutes or hours; keep it short and rely on refresh tokens.
4. Grant scopes and permissions
OAuth Scopes are the scopes this client may request. Each one expands to show the claims it releases, so you can see exactly what the application will learn about the user.
Permissions are only used when the client calls APIs in its own name via
client_credentials. Each permission expands to show the resource endpoints it unlocks.
Leave this empty for a client that only acts on behalf of users.
5. Configure the authorization flow
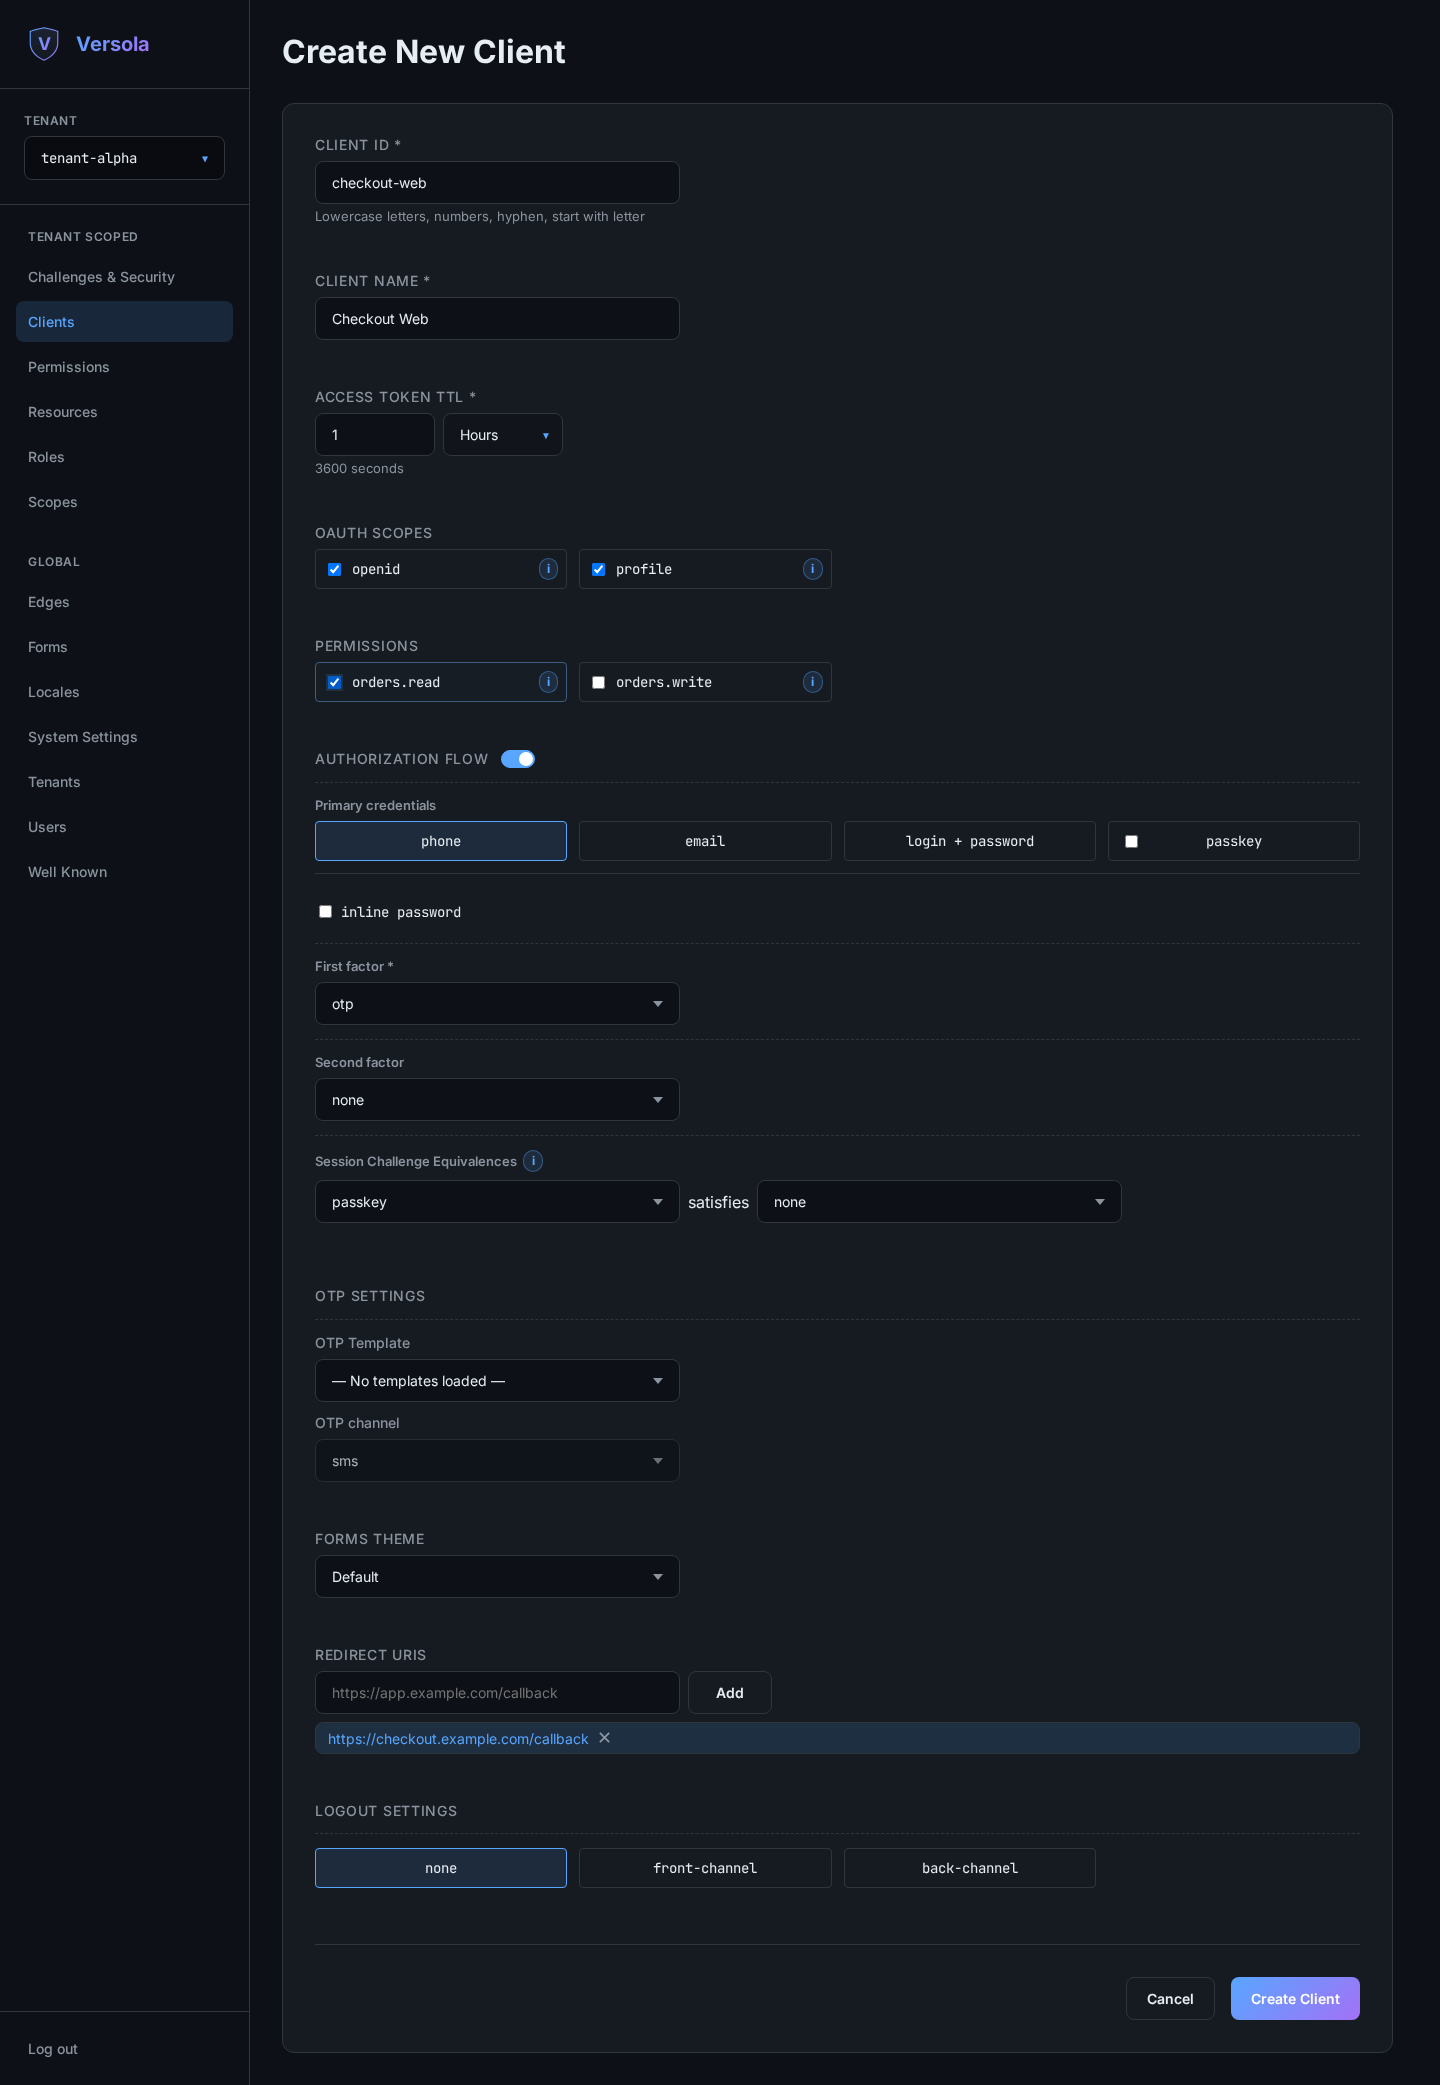
The Authorization Flow section defines the login experience for this client:
- Primary credentials — what the user is asked for first:
phone,email, orlogin + password. - First factor — the challenge that follows:
otporpassword. - Second factor — an optional additional challenge.
- Passkey — offer passkey sign-in, optionally with its own follow-up factor, and optionally prompt users to enroll one.
- Session Challenge Equivalences — declare that a challenge already passed in the session satisfies another one, so returning users are not asked twice.
- OTP Settings — the template and delivery channel used for one-time codes. The channel is locked to SMS when the primary credential is a phone number.
- Forms Theme — which theme renders the login screens.
Turning the Authorization Flow toggle off makes this a pure client_credentials
client: scopes, redirect URIs, themes and logout settings are then not applicable and the
form hides them.
6. Enable self-registration (optional)
A Registration toggle appears once the primary credential is phone or email and
inline password is off — registration needs an entry credential to verify with an OTP, so
it is not available for login + password clients.
Turn it on to let new users create an account from the credential card instead of only signing in. The Credential to verify is locked to whatever primary credential you chose above.
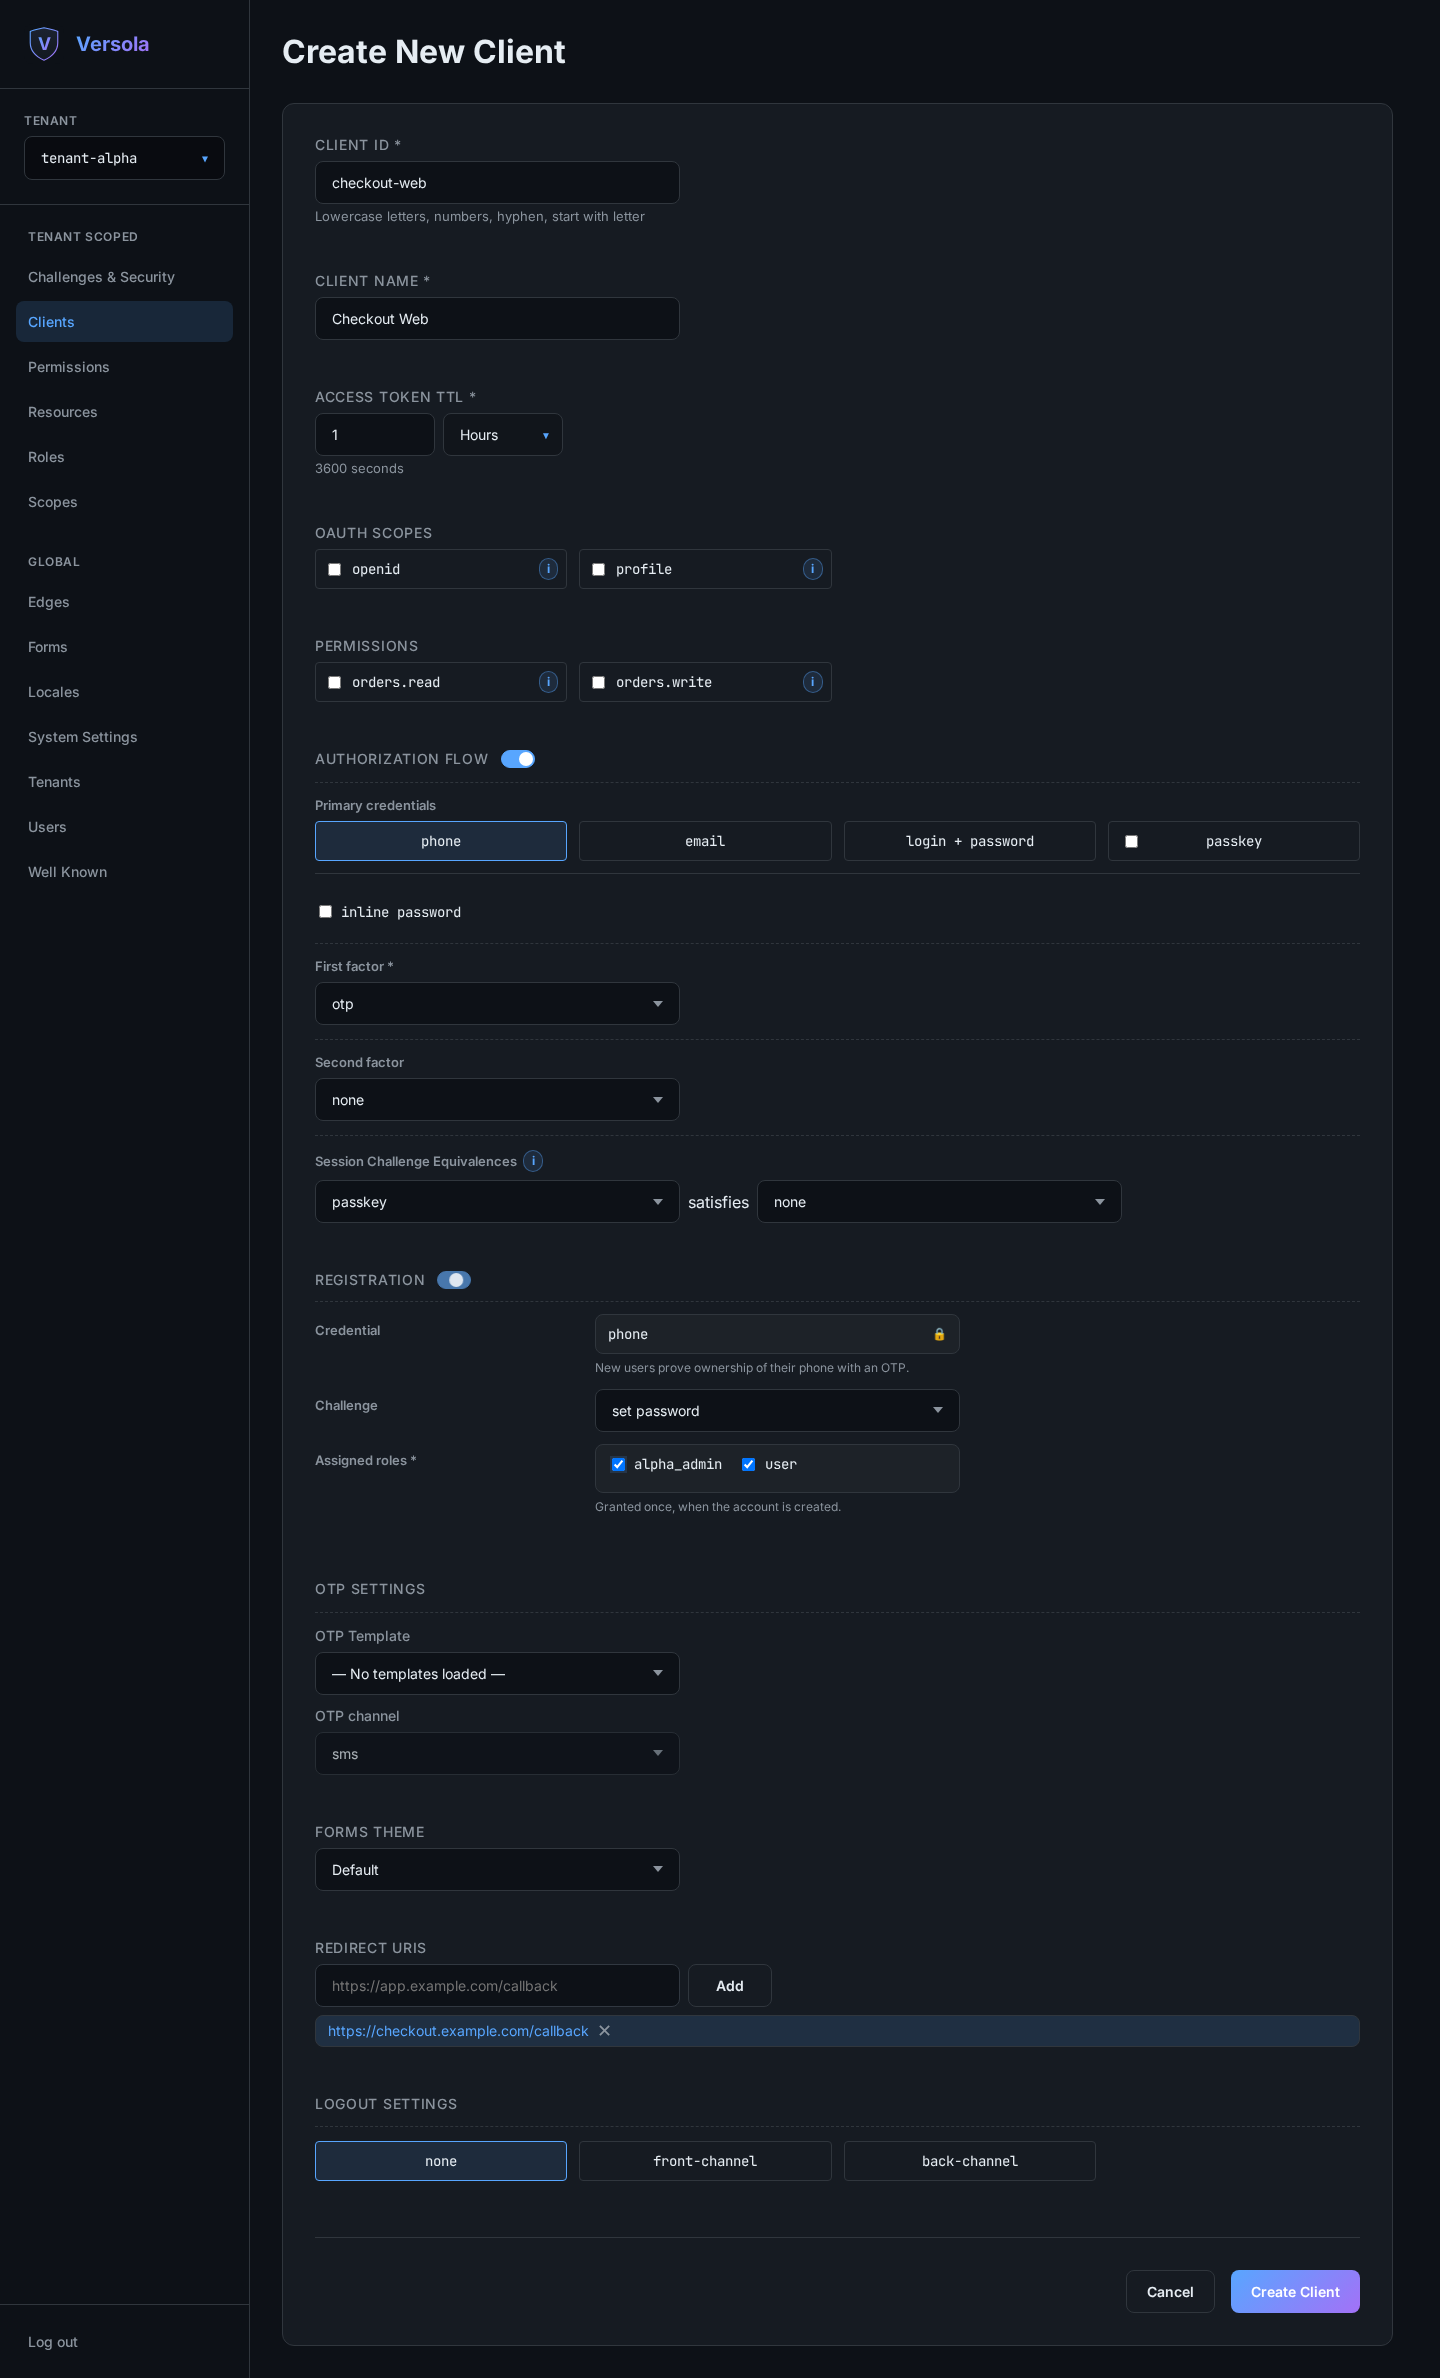
- Challenge — what happens after the OTP succeeds:
none(the account is created and the user signs in immediately),set password, orenroll passkey. - Assigned roles — the roles granted to the account the moment it is created, for the currently selected tenant. At least one role is required.
A credential that is already registered never reveals that fact: submitting it silently falls back to an ordinary OTP sign-in instead of continuing the registration challenge, so registration cannot be used to enumerate existing accounts.
7. Add redirect URIs
Type each URI and press Enter or Add. They must match the values the application will
send as redirect_uri exactly; anything else is rejected at /authorize.
8. Configure logout (optional)
Choose front-channel or back-channel logout and supply the corresponding URI if the application needs to be notified when a session ends.
If this client sits behind an edge, point it at edge’s own logout endpoints instead of a
client-specific URL: /logout/frontchannel and /logout/backchannel. Edge exposes both
out of the box and clears the session for every client routed through it, so you don’t need
to implement either endpoint yourself.
9. Create and store the secret
Press Create Client. Versola generates a client secret and shows it once.
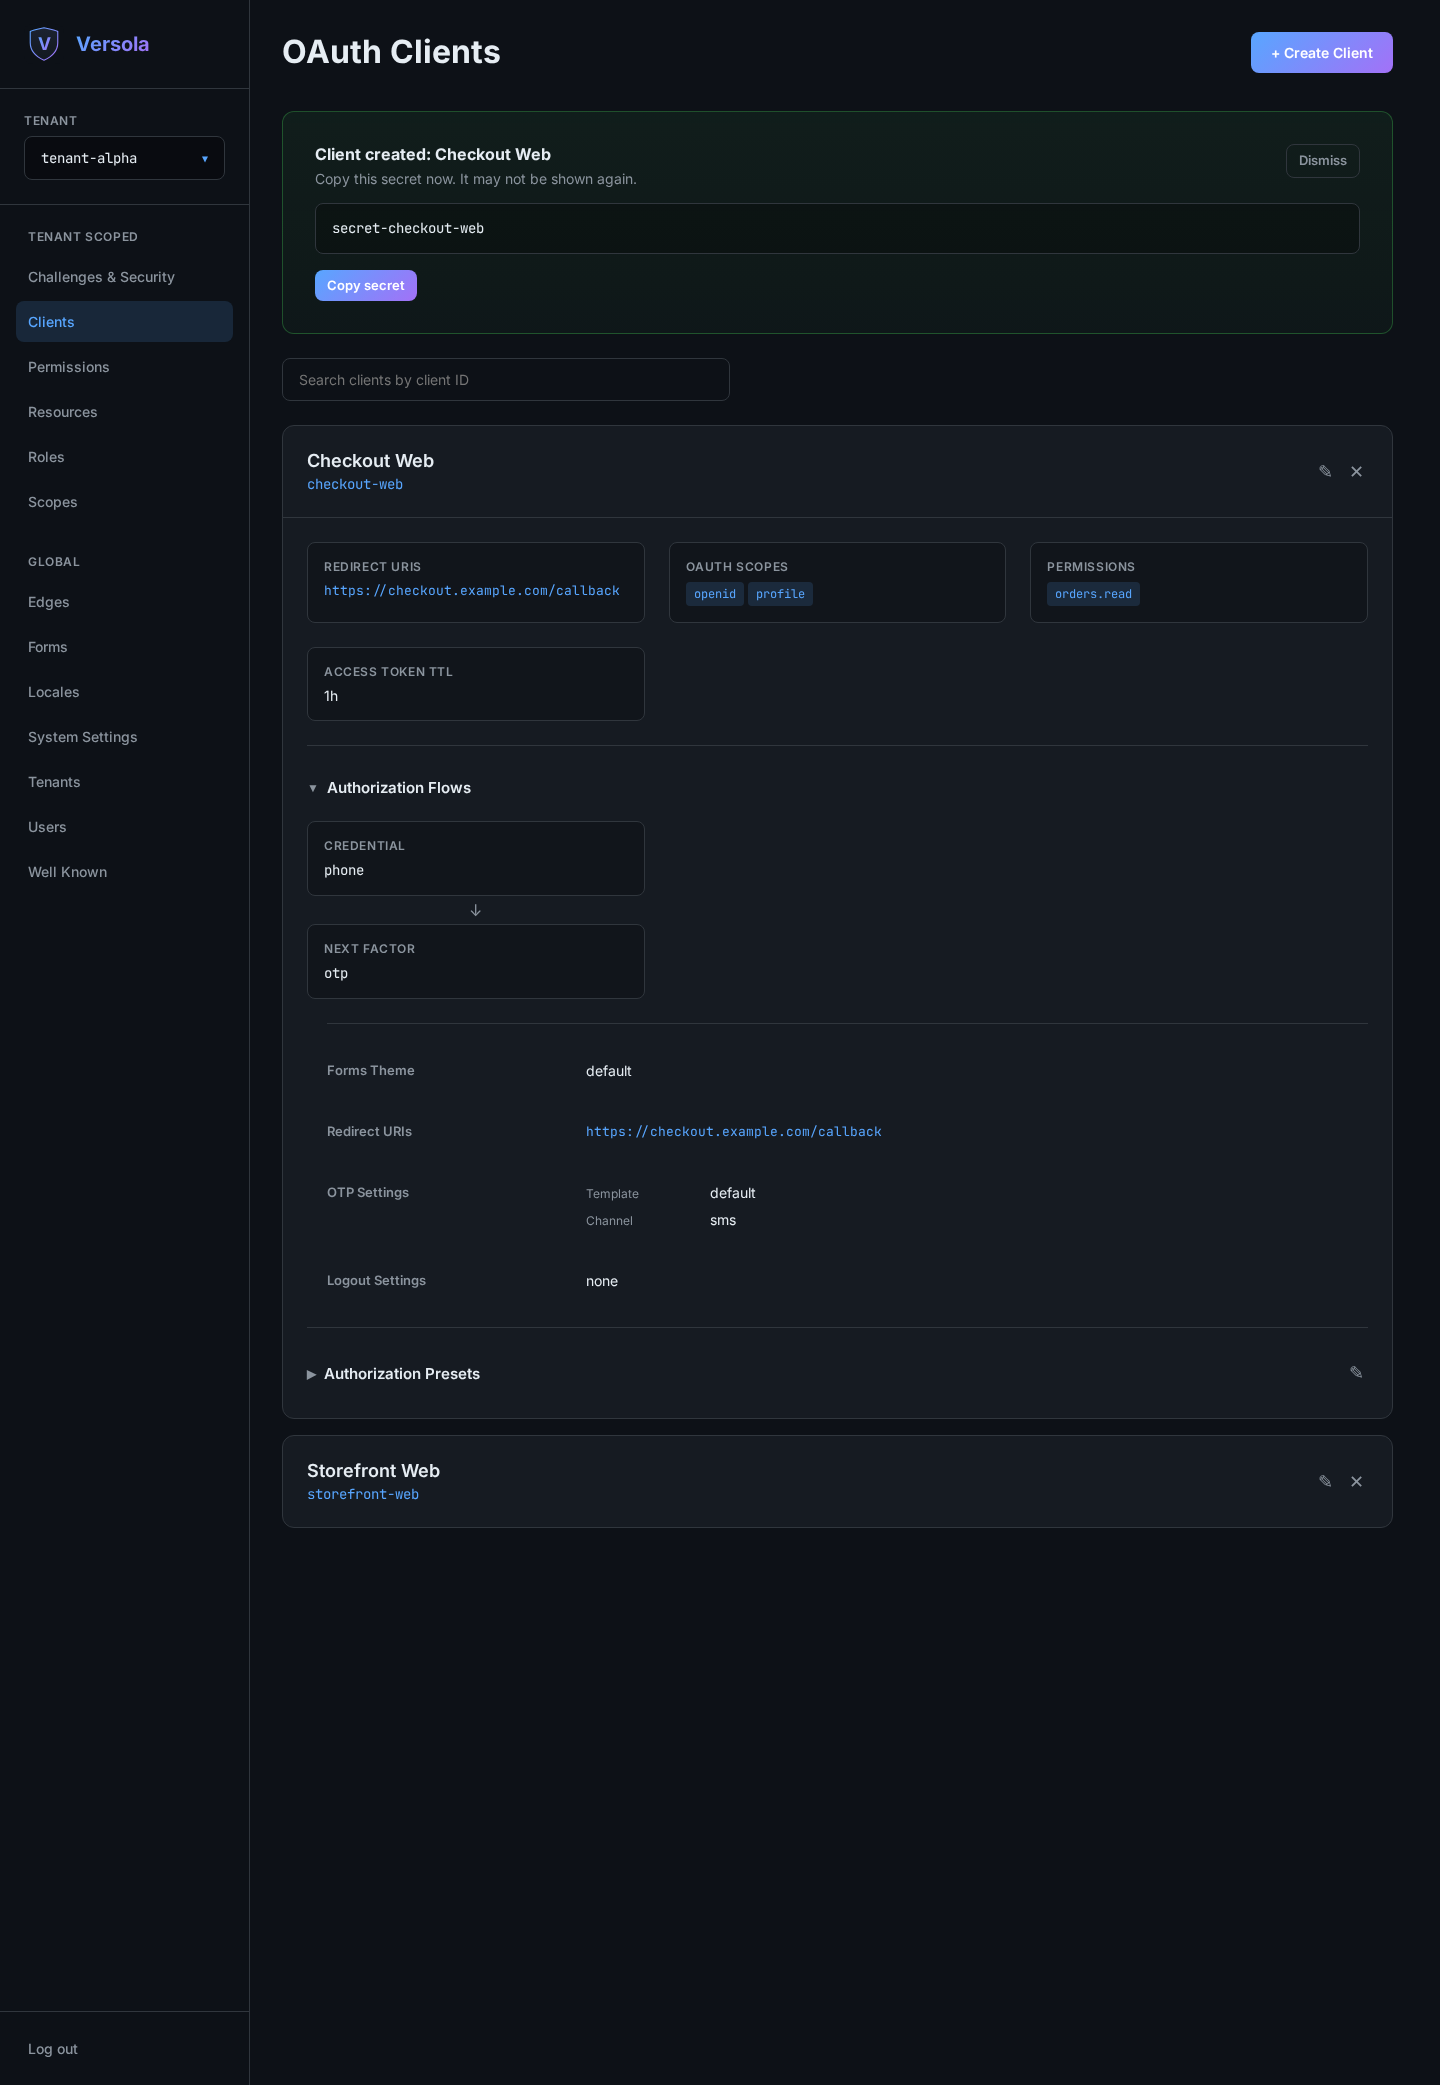
Copy it into your secret store immediately. It cannot be retrieved later; if you lose it, rotate the secret from the client’s edit screen.
Rotating a secret
Open the client for editing and press Rotate Secret. Versola issues a new secret and keeps the previous one valid, marking the client with a Secret Rotation badge. Deploy the new secret, then press Delete old secret to complete the rotation.
Next steps
- Register the APIs this client will call: How to register a resource
- Add the client to those resources’ Audience so it can obtain tokens for them.